Measuring Scratches with a Surface Roughness Tester

S

Scotticusprime

The company I work for has a manufacturing process that is causing longitudinal and transverse scratches on the outside surface of a cylindrical, carbon-alloy part. The standard specification for this part defines the acceptable surface finish, but does not define acceptance/rejection criteria for discontinunities - like scratches.

Several people at my company and at a related company are wanting to measure the scratches using a surface roughness gauge (Surftest SJ-201P) to accept/reject the parts. My understanding is that this would be a misuse of the tester, because it is designed to take several samples of the surface roughness and provide an "average", essentially removing outliers like a scratch.

The conversation is not going well. Please help me explain why the surface roughness gauge is not going to work. Also, I am open to the possibility that I am wrong.

Secondly, I am setting acceptance/rejection criteria for these scratches (depth,width,length) and I am looking for a device that will measure these aspects. So far, I am looking at optical micrometers for measuring scratch depth? What can used to measure width?

Regards.
 

harry

Trusted Information Resource
Welcome to the Cove.

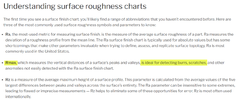
Have a look at this to differentiate the definition of the 3 measures of roughness, Ra, Ry and Rz. Ry seems to be what you are looking for. It does not remove a scratch as an outlier but will indicate its presence by a higher average reading than one without any scratches.
 

Attachments

  • Technical Data - Surface Roughness.pdf
    121.7 KB · Views: 540

Jen Kirley

Quality and Auditing Expert
Leader
Admin
Digital profilometers are designed to, as a rule deliver a reading that is the average of the profile readings taken over the length of the stylus's travel. My review of Mitutoyo's manual titled Surftest Measurement Surftest SJ-201/SJ-301 satisfies me that you are correctly describing the model SJ-201's limitations for measuring the scratches. The model SJ-301, with is digital and printable readout can show the heights that are being calculated for the average, apparently allowing an inspector to identify the individual profile readings (as described by the manual, to allow the individual readings to be excluded from the average).
 
I

iamtroll

There are many more surface parameters than Ra, Ry and Rz. If you look at http :// www. mitutoyo.co.uk/Mit/downloads/form/Surface-overview.pdf (OBSOLETE BROKEN 404 LINK(s) UNLINKED) you will see that there are a signifinant number of parameters that can be measured with the right device. A simple profilimeter may not be able to do what you need but if you check with manufacturers and not just Mitutoyo, I'm sure that for a price you can find a way to measure your surface. You just have to decide what is the right prices for your inspection requirements. Hope this helps.
 
Last edited by a moderator:
S

surinraj

Hi Guys,

My boss has just asked me to recommend him a method of checking Ra 0.4um considering the parallelism with 5um. This is for the lapping process that the part is going through. It will be great if someone can help here. Attached is the prints for further info.

Kumar
 

Attachments

  • prints.jpg
    prints.jpg
    37.5 KB · Views: 282

Pzol218

Registered
Hi, I do have a similar issue.
recently I rejected a batch of castings components due to a scratch on a machined surface. The supplier's argument was the surface finish on the said area is within the specs as they measured the Ra. and my point is the scratch is a defect and is not part of the surface finish and you can't include them in the roughness measurement. any thought ?
 

Jim Wynne

Leader
Admin
Hi, I do have a similar issue.
recently I rejected a batch of castings components due to a scratch on a machined surface. The supplier's argument was the surface finish on the said area is within the specs as they measured the Ra. and my point is the scratch is a defect and is not part of the surface finish and you can't include them in the roughness measurement. any thought ?
If a scratch is a defect, how is it defined in the specifications?
 

Mike S.

Happy to be Alive
Trusted Information Resource
I cannot recall where I got the guidance, but in a prior work life isolated scratches were a defect class outside surface finish and we never measured SF over a scratch.
 
Top Bottom